Illustrated Tutorial
Creating "Engraved" Style Text in Photoshop
Written by: Dmitry Fadeev
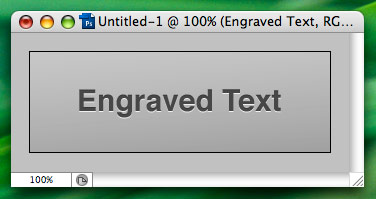
"Engraved" style text is becoming more popular these days, especially on the Mac OS X platform, where the latest Leopard update will feature the effect throughout the new user interface. Engraved text looks like it was 'cut-out' or engraved in metal or other material, and has a very effective 3D feel to it. In this tutorial I will show you how you can quickly generate this effect using Adobe Photoshop CS3 (previous versions of Photoshop should function similarly). Almost no prior Photoshop experience is required for this tutorial.
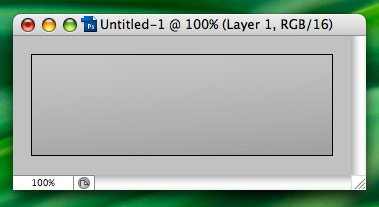
The first step is to create the virtual canvas for your new image. Go to the 'File' menu and select 'New'. The settings here don't really matter so much, and I am sure you are familiar with them, so just create a new file, aprox. 300 x 150 pixels in size with 16 bit color. Once your new canvas appeas on the screen, feel free to fill it in with a color using the 'Paint Bucket' (G) fill tool from the left hand side toolbar. Here, I will use a grey gradient to give it a metallic look.
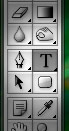
The next thing we do is add the actual text. Select the 'Type' (T) tool from the toolbar:
Select a font that you like from the context sensitive toolbar on the top, and set the color to black. Here, I will use a fairly large Helvetica (30 px size):
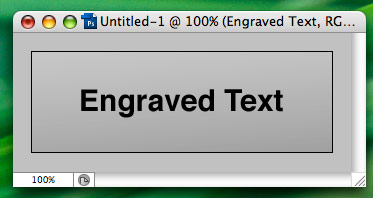
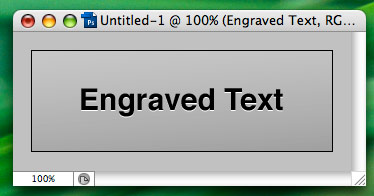
Click somewhere on your canvas and write something. I'm just going to write "Engraved Text":
Click somewhere else on the canvas, and write the same thing (or you can duplicate the layer). Select it and change the font color to white using the context sensitive toolbar at the top. You should now have two layers of the same text, one black and one white:
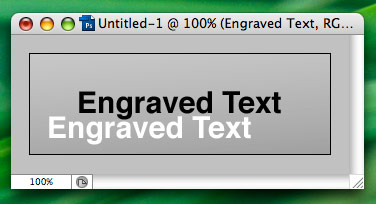
Using the 'Move' tool (M) or simply using your keyboard arrow keys, place the white font directly over the black, and then move it down 1 pixel. The default Photoshop settings may mean the white text 'snaps' right over the black text like a magnet, so once it does so tap the downward arrow key on your keyboard once to move it down 1 pixel. In the 'Layers' panel on the right hand side, click and drag the white text down so it goes underneath the black text in the layer list hierarchy as follows:
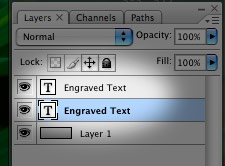
Now the black text should be on top.
Still looking at the 'Layers' panel, click on the 'Opacity' controls and move the slider down to around 70%. You can also select the white text layer and change its opacity as well, change it to around 80%, or something that looks good on the canvas, as you will start to see the effect take shape.
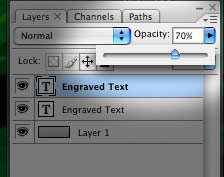
That's it! Once you've tweaked the opacity values, the engraved text effect is complete: