Favicon Guide
The 5 Minute Illustrated Tutorial on Creating and Implementing Your Own ‘favicon’.
Written by: Dmitry Fadeev
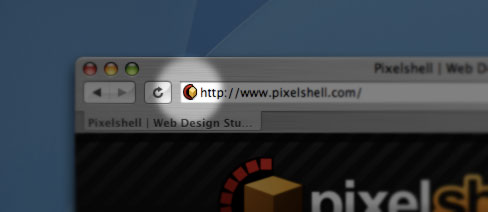
I assume you know what a ‘favicon’ is if you’re reading this, but to those who arrived here by casual browsing and are not familiar with the term I will provide a quick definition: a favicon (also known as a page/website icon) is a little image that is displayed on most web browsers by the left side of the URL address in the top address bar field, and also usually in the favourites/bookmarks listing by the name of the page. The reason it’s called a favicon is because it was originally intended just to serve as a bookmarks/favourites icon — and hence, favicon. These days many browsers display the icon by the site URL address, and so many sites now like to implement their own little favicon to stand out from the crowd. Here’s a picture of the Pixelshell favicon viewed from the Safari browser:
So now that we know what a favicon is, how do we make and implement it? The procedure is very simple, and I will split it into two short sections: creation and implementation.
1. Creation
The easiest way to make a favicon is using a graphics editor like Adobe Photoshop (or any other graphics editor that will be able to create .ico files). By default, Photoshop may not have the required plugins to be able to save a file in .ico (Windows icon) format, so you will need to download and install the plugins. Fear not, this will only take a minute, so go grab them from: www.telegraphics.com.au/sw/ Make sure to get the right plugin version (there are separate versions for Windows and Mac OS X). Follow the installation instructions in the "readme" file to get it installed, though it should just be a case of putting the files in the right plugin folder.
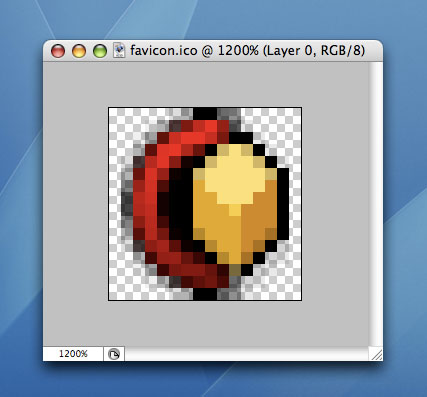
With the ICO plugin installed for Photoshop, you can start making your icon. Make a new file with dimensions 16 x 16 pixels, and get creative. You can start with a transparent background, which is probably a good idea if you want the icon to sit nicely on different backgrounds (e.g. the grey/textured background on various browsers' favourites lists). Hopefully your creative results fare a bit better than my attempt here (shown at 1200% zoom):
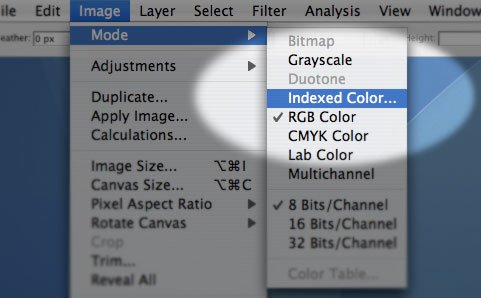
Now, in order to save our new masterpiece as an ICO file, we need to make sure the color mode is set to 'indexed'. You can do this by going to the 'Image' menu, and then the 'Mode' sub-menu, and finally by selecting 'Indexed Color'. Make sure it says 256 colors, and click OK. Here's the 'Indexed Color' menu on OS X:
Then just go to save the file using 'Save As' under the 'File' menu and you'll be able to select the ICO format from the format drop down box. Call the new file "favicon". That's it, we've got our new icon file ready!
2. Implementation
If everything was done correctly, this step will be very short and sweet. Just upload the new "favicon.ico" file to your home folder on your webserver. That's it! Refresh your browser to see if it works.
Congratulations! You now have a working favicon. The default settings on most web servers will use the 'favicon.ico' file as the default favicon if it's placed in your root directory... however, if it didn't work, then we can do something to fix it. Simply add the following line of code somewhere between the "<head>" and "</head>" tags in your XHTML code (making sure to change the "href=" value to the address where the icon is stored):
That line of code explicitly tells the browser where to find the favicon file, and what format the file is in. In this case our file is in the ICO format, however, it is possible to use other formats such as GIF and PNG. If you do use GIF or PNG, make sure to firstly change the "href" portion of the line of code to point to your newicon (it doesn't even have to be called favicon), and secondly, change the "type" to say "image/gif" if it's a GIF file or "image/png" for PNG — as it is now, the "image/vnd.microsoft.icon" indicates its a Microsoft ICO file. The disadvantage of this method is that you're going to have to specify the icon on each page, so it is best to just create a standard 'favicon.ico' file and throw it in your server root. That's it, enjoy your new site icon.